Save
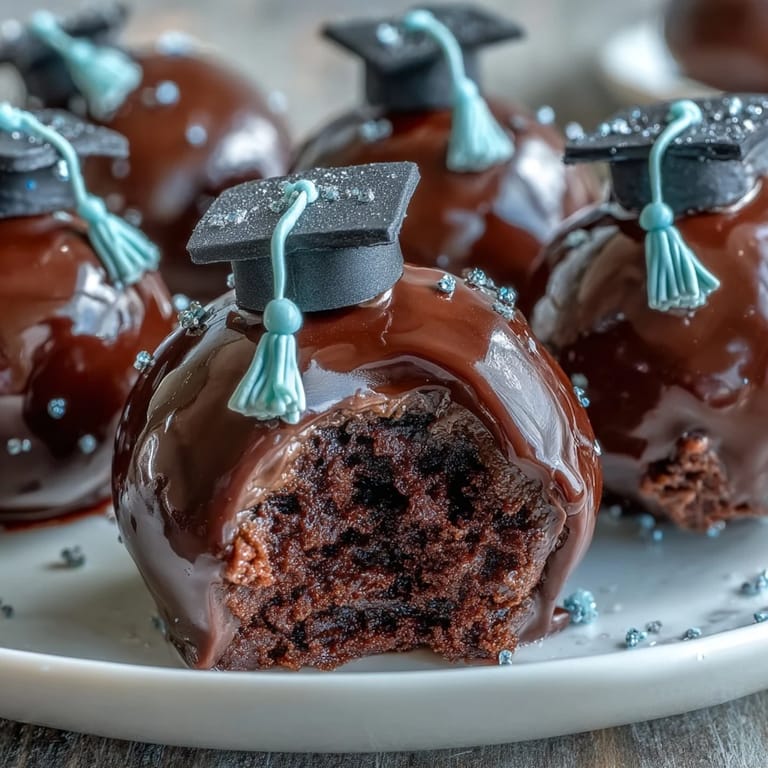
Save The sound of laughter echoing in the kitchen as I prepared these graduation cake pops still brings a smile to my face. There was a certain excitement in choosing the school colors, melting chocolate, and watching edible glitter scatter across the countertop. I remember wondering if I'd ever manage to get the pops standing upright without a single one toppling over. The scent of sweet cake crumbs mingled with the sharp, almost waxy aroma of melted candy melts—an odd, but comforting combination. For me, it felt less about perfection and more about celebration with each step.
The first time I made these for a cousin&aposs graduation, I had kids gathered around, eager to pick which sprinkles matched their school colors. Someone dropped a pop, and instead of fussing, we decided it would be our &aposlucky pop,&apos destined to be eaten first. Making these together felt like a team effort, each pop becoming its own tiny celebration. That memory, filled with giggles and chocolate smudges, still lingers every time I melt the candy melts. I genuinely think these cake pops started a tradition in our family that continues with every new graduate.
Ingredients
- Cake: Use either a mix or homemade cake—just make sure it&aposs cooled completely so the crumbs don&apost turn soggy. I learned to break my cake into larger pieces before crumbling for an even texture.
- Frosting: Choose cream cheese or buttercream for binding—start small and add just enough until your mixture holds together. Too much frosting can make the pops slide right off the sticks.
- Candy melts: Grab these in school colors for celebrations, and melt gently to prevent burning. A little vegetable shortening keeps the coating smooth.
- Sprinkles, edible glitter, or colored sugar: Let kids (or yourself) go wild here; sparkly toppings cover flaws and bring the pops to life.
- Lollipop sticks: These are essential for display and handling, and inserting them after dipping in chocolate helps anchor the cake balls.
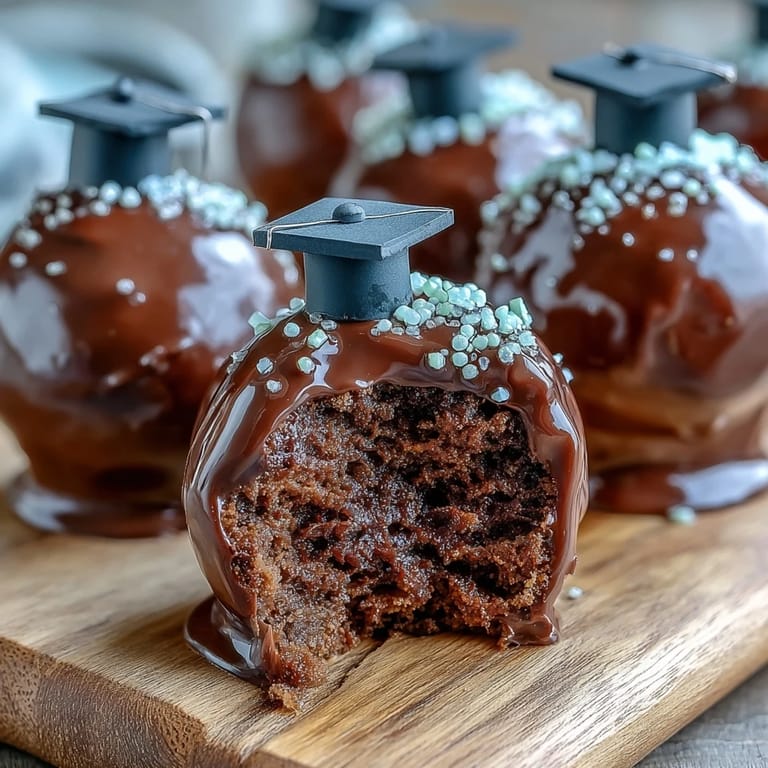
- Mini chocolate chips & fondant: Use for decorating graduation caps and tassels—fondant squares sit surprisingly well atop coated pops.
Tired of Takeout? 🥡
Get 10 meals you can make faster than delivery arrives. Seriously.
One email. No spam. Unsubscribe anytime.
Instructions
- Bake & Cool the Cake:
- Bake your cake according to box or recipe instructions and let it cool completely — patience here keeps your crumbs from getting mushy.
- Crumble & Mix:
- Break your cooled cake into fine crumbs in a large bowl, then fold in just enough frosting so the mixture presses together, but doesn&apost get sticky.
- Shape the Pops:
- Roll tablespoon-sized portions into 24 balls, placing them on a lined baking sheet; it gets messy, but the mixture should feel dense and malleable.
- Chill for Firmness:
- Cover and chill cake balls in the fridge for at least 1 hour, or freeze for 20 minutes for quicker results.
- Melt the Coating:
- Microwave candy melts or chocolate in short bursts, stirring between each round—if it seems thick, add vegetable shortening until silky.
- Stick & Dip:
- Dip each lollipop stick tip in melted coating, then insert halfway into each chilled cake ball; this anchors the pop.
- Coat & Decorate:
- Dip cake pops fully, tap off excess, then decorate while wet with sprinkles, colored sugar, or cap toppings—act quickly as the coating sets fast.
- Set & Serve:
- Stand pops upright in styrofoam or a cake pop stand, letting them set completely so the coating hardens before serving.
 Save
Save When we set up for the graduation party, these pops became conversation starters—people were drawn to their colors and sparkling finishes. I still remember a friend asking if I could make school-themed treats for their child next year, and feeling proud that a simple dessert could become a signature celebratory touch.
How To Get Your Pops Extra Smooth
At first, my cake pops looked more like bumpy planets than glossy spheres. Chilling the rolled balls until firm makes dipping much easier. Using vegetable shortening helps the chocolate glide…and a little patience ensures the coating won&apost crack as it hardens. Holding each pop and slowly turning it gives a professional finish — don&apost rush the process.
Fun Ways To Decorate For Graduation
I love setting up bowls of sprinkles and colored sugar so everyone can get creative. Edible markers add year numbers, fondant caps give pops a graduation vibe, and mini chocolate chips work perfectly for tassels. Letting everyone pick their style keeps it playful—and helps prevent arguments over which pop is whose.
Keeping Your Cake Pops Fresh
After the party, any leftover cake pops can be stored in an airtight container at room temperature or in the fridge. If you refrigerate, let them come to room temp before serving so the coating doesn&apost crack. Avoid stacking pops so decorations stay intact.
- Rest pops upright in styrofoam for the best display.
- If you travel, use a sturdy cake pop stand to prevent damage.
- Always check labels if making gluten-free versions for guests.
 Save
Save I hope these graduation cake pops make your celebration brighter and tastier. Don&apost stress small imperfections—they bring character and joy to the treat.
Recipe Questions & Answers
- → How do I customize colors for cake pops?
Use colored candy melts or tint white chocolate with food coloring. Match decorations to your school colors with sprinkles or fondant accents.
- → Can I use homemade cake instead of mix?
Absolutely. Prepare and fully cool a homemade 9-inch cake, then crumble for cake pop mixture.
- → What is the best coating for cake pops?
Candy melts or melted chocolate work well. Add vegetable shortening for a smoother, thinner coating if needed.
- → How do I make graduation cap decorations?
Use fondant squares for caps and mini chocolate chips for tassels. Attach with melted chocolate for secure placement.
- → How should cake pops be stored?
Store cake pops in an airtight container at room temperature for up to 3 days or refrigerate up to one week.
- → Are cake pops suitable for gluten-free diets?
Yes, use gluten-free cake mix and check all ingredient labels for allergen information.