 Save
Save There's something magical about how a simple butter cookie becomes a celebration when you scatter rainbow sprinkles across it. My kitchen smelled like toasted vanilla and melted butter the afternoon I first tested these bars, and before I knew it, my neighbors had caught wind of the aroma and stopped by. What started as a quiet baking experiment turned into an impromptu St. Patrick's Day tasting, complete with laughter and the kind of mess that only happens when people genuinely enjoy what you've made.
I brought these to a workplace potluck during March, and what surprised me most wasn't how quickly they disappeared, but how many people admitted they'd been craving something sweet that wasn't pretentious or complicated. Someone asked if I'd make them for her daughter's classroom party, and I realized these bars had somehow become the kind of recipe that bridges the gap between a quick treat and something worth sharing.
Ingredients
- All-purpose flour (2 cups): The foundation that keeps these bars tender and cake-like; don't sift unless your flour is packed down, or you'll end up with something too dense.
- Baking powder (1/2 teaspoon): Just enough lift to make the crumb delicate without making them rise too much or taste metallic.
- Salt (1/4 teaspoon): Balances the sweetness and makes the butter flavor sing in a way that seems small but matters.
- Unsalted butter, melted and cooled (3/4 cup): Melt it ahead of time so it cools slightly; hot butter can cook the eggs when you whisk them together.
- Granulated sugar and light brown sugar (1 cup plus 1/2 cup): The combination gives you caramel notes from the brown sugar while the granulated sugar keeps everything tender and delicate.
- Eggs (2 large): Room temperature is ideal, so pull them out while you're prepping; they'll incorporate more smoothly and give you a better crumb.
- Pure vanilla extract (2 teaspoons): Don't cheap out here, as the flavor really carries through in something this simple.
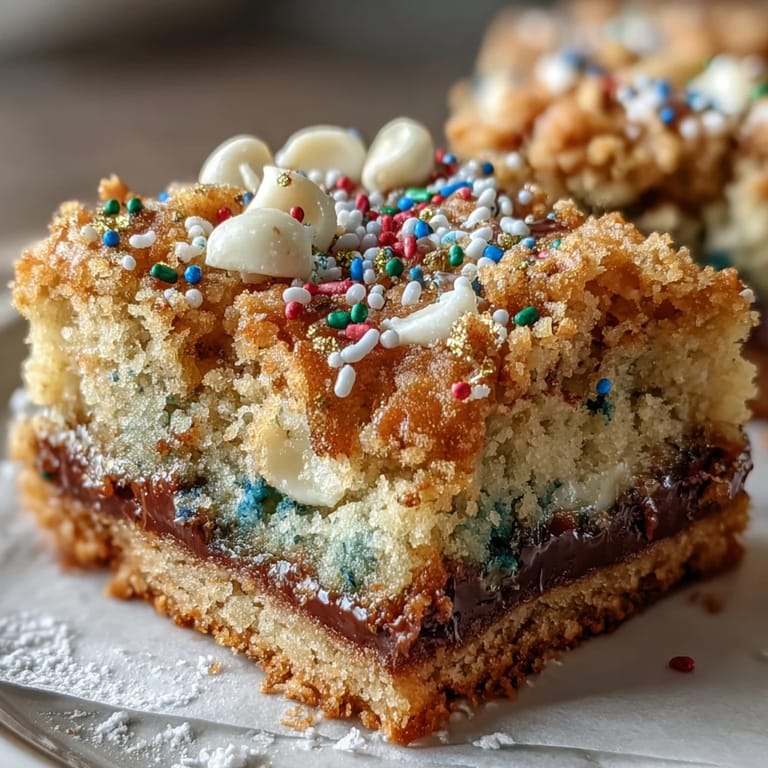
- White chocolate chips (3/4 cup): They soften into the bars and create little pockets of sweetness; if you prefer more chocolate flavor, swap half for semisweet.
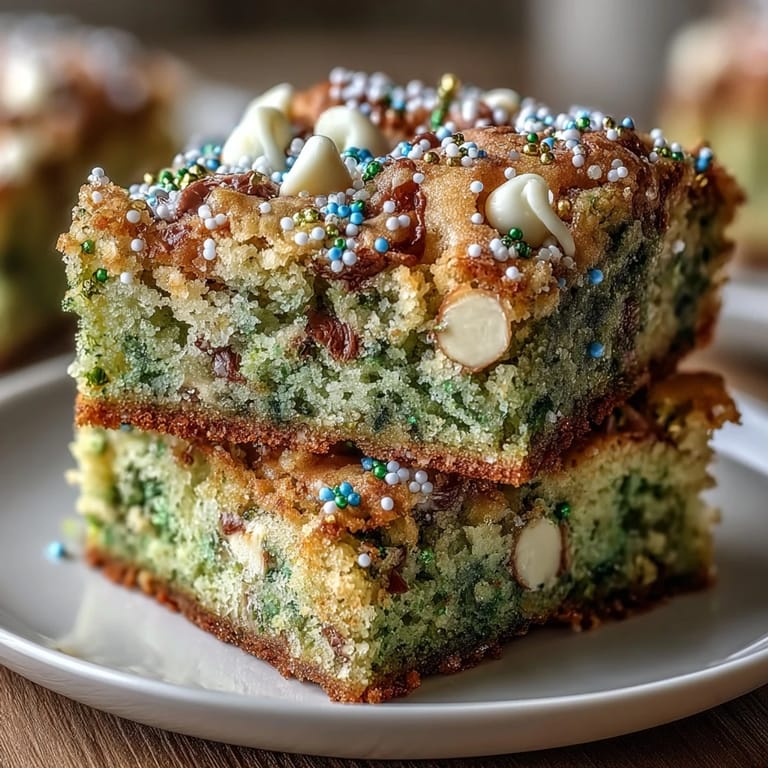
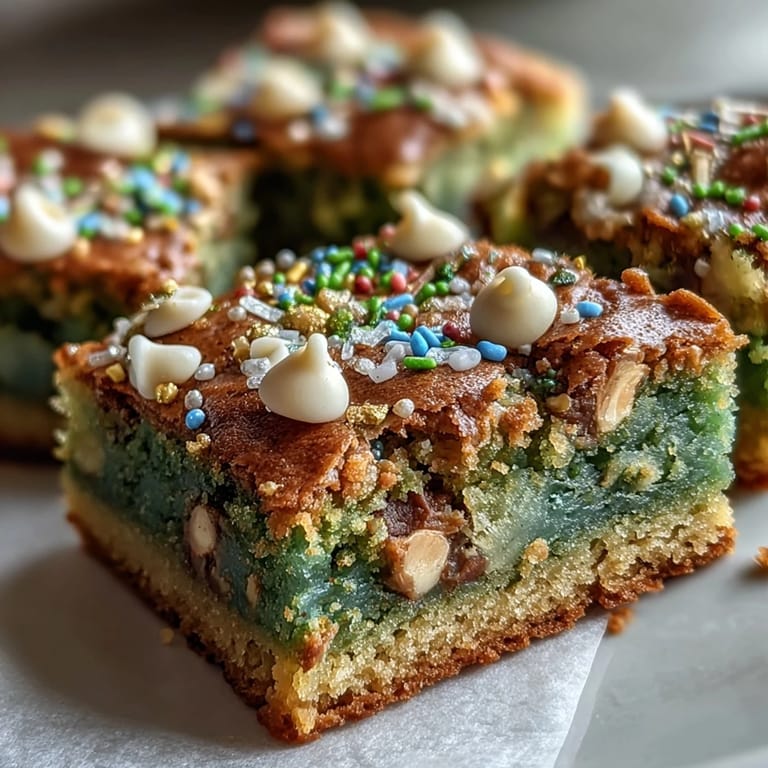
- Rainbow sprinkles (1/2 cup, divided): Save some for the top so they stay vibrant and don't bake into obscurity; the contrast between top and mixed-in sprinkles is what gives these their festive personality.
Tired of Takeout? 🥡
Get 10 meals you can make faster than delivery arrives. Seriously.
One email. No spam. Unsubscribe anytime.
Instructions
- Set yourself up for success:
- Preheat your oven to 350°F and line that 9x9 pan with parchment paper, leaving edges hanging over the sides so you can lift the whole thing out later without wrestling with it. This small step saves you from broken bars and frustration.
- Build your dry foundation:
- Whisk flour, baking powder, and salt in a medium bowl and set it aside. This way, you're not hunting for ingredients mid-mix when your hands are already sticky.
- Cream your wet ingredients:
- In a large bowl, whisk the cooled melted butter with both sugars until it looks smooth and well combined, then add eggs and vanilla and whisk until everything is fully incorporated and slightly pale. This takes about a minute if you're being thorough, and it matters more than you'd think.
- Bring it together gently:
- Fold the dry ingredients into the wet ingredients using a spatula, mixing just until you don't see streaks of flour anymore. Overmixing develops gluten and makes the bars tough, so resist the urge to stir vigorously.
- Add the festive elements:
- Stir in the white chocolate chips and two-thirds of the sprinkles until they're distributed throughout, then spread the batter evenly into your prepared pan. Sprinkle the remaining sprinkles across the top so they'll stay bright and colorful.
- Bake until golden:
- Bake for 25 to 28 minutes; the edges should be golden and a toothpick inserted into the center should come out mostly clean with just a few moist crumbs clinging to it. If it comes out completely wet, give it another minute or two.
- Let them rest:
- Cool the entire pan on a wire rack before cutting; this lets the crumb set properly so you get clean bars instead of crumbly pieces. Patience here makes all the difference.
 Save
Save There's a moment when you hand someone a plate with one of these bars and watch their expression shift from polite to genuinely delighted. That's when you realize it's not really about the recipe at all; it's about creating something that feels like celebration in bar form.
When to Make These
March comes with a built-in excuse to make something green and festive, but honestly, these bars work year-round if you just swap the sprinkle colors. I've made red-white-and-blue versions for July Fourth, and orange-and-black ones for Halloween, and every time people react like you've performed actual magic in the kitchen. The recipe is flexible enough that you can adjust for whatever celebration is happening in your life.
Storage and Make-Ahead Strategy
These bars live happily in an airtight container at room temperature for up to four days, which means you can make them the day before without any anxiety about them going stale. The white chocolate keeps them from drying out as quickly as plain sugar cookies would, and the sprinkles don't fade or lose their charm if you're storing them properly.
Upgrades and Variations
If you're feeling like adding one more layer, you can drizzle melted white chocolate over the cooled bars in thin lines for elegance, or top each one with a tiny shamrock candy before serving. The base recipe is solid enough that it welcomes these additions without falling apart or becoming too heavy.
- Substitute white chocolate chips with semisweet or milk chocolate if you prefer deeper chocolate notes over bright vanilla.
- Try crushing some of the sprinkles before mixing them in if you want more color distribution and a more subtle appearance.
- Make these ahead and freeze them in a single layer, then transfer to a container; they thaw in about 20 minutes and taste just as good.
 Save
Save These St. Patrick's Day rainbow cookie bars are the kind of recipe you make once and end up making again because people ask for them. They're proof that you don't need complicated techniques or obscure ingredients to create something genuinely worth sharing.
Recipe Questions & Answers
- → What ingredients create the colorful layers?
Rainbow sprinkles add vibrant color, while white chocolate chips contribute creamy sweetness to the bars.
- → What type of flour is used in these bars?
All-purpose flour provides the base, giving structure and a tender crumb.
- → How long should the bars be baked?
Bake the bars at 350°F (175°C) for 25–28 minutes until edges turn golden and a toothpick comes out mostly clean.
- → Can I substitute white chocolate chips?
Yes, semisweet or milk chocolate chips can be used as alternatives for different flavor profiles.
- → What is the best way to cool and store the bars?
Allow bars to cool completely on a wire rack before slicing. Store in an airtight container at room temperature for up to four days.
- → Are these bars suitable for vegetarians?
Yes, all ingredients comply with a vegetarian diet.