Save
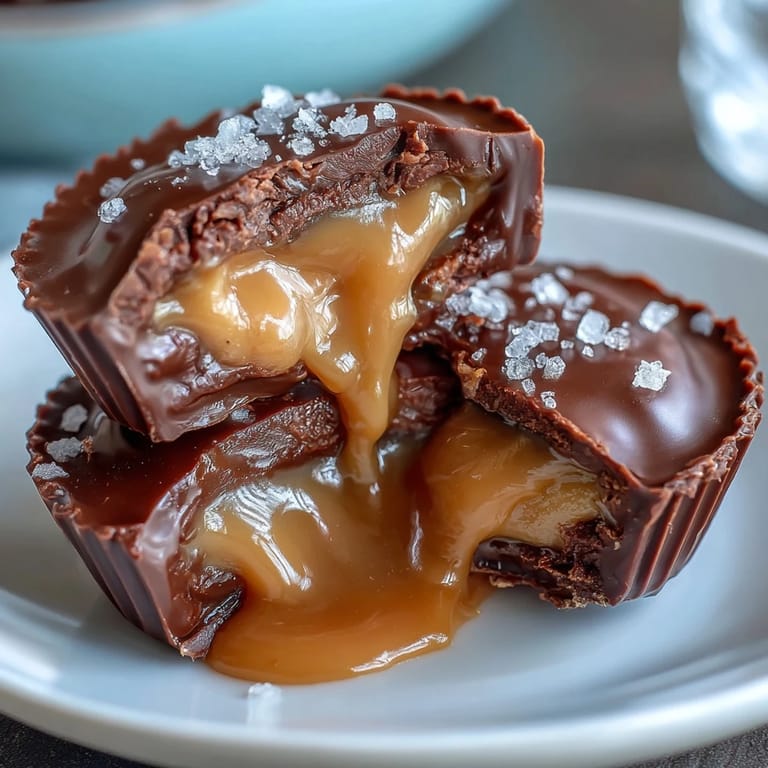
Save My sister texted me a photo of some fancy peanut butter cups from a boutique chocolate shop, and I stared at the price tag so hard I nearly dropped my phone. That's when it hit me—I could absolutely make these at home, probably better, and definitely cheaper. The first batch turned out surprisingly good, but I'd oversalted the caramel like I was seasoning a pot roast instead of candy. Now, years later, I've cracked the code, and these homemade cups have become my go-to gift when I want to impress someone without spending all afternoon in the kitchen.
I made a batch for my book club and watched three different people close their eyes after the first bite—that's the moment I knew I'd nailed it. One friend asked if I'd finally quit my job to open a chocolate shop, and honestly, the compliment stuck with me more than I expected. There's something quietly satisfying about handing someone a treat you made with your own hands, especially when it tastes like you've been trained by Swiss chocolatiers.
Ingredients
- Semisweet or milk chocolate, 300 g (10 oz), chopped or chips: This is your foundation, so don't cheap out here—taste a piece before committing to the whole bag, because bad chocolate makes bad candy.
- Coconut oil or unsalted butter, 2 tbsp: Coconut oil keeps the chocolate silky and tempering-forgiving, while butter adds richness if you prefer a more indulgent snap.
- Creamy peanut butter, 120 g (½ cup): The natural kind works beautifully, but make sure it's at room temperature or it'll fight you when mixing.
- Powdered sugar, 2 tbsp: This sweetens the peanut butter layer without adding grittiness that granulated sugar would bring.
- Unsalted butter, 1 tbsp (peanut butter layer) plus 2 tbsp (caramel): Softening the first batch before mixing prevents lumps and creates a smoother filling that spreads like a dream.
- Vanilla extract, ½ tsp: Just enough to make people wonder what secret ingredient makes these taste so polished.
- Granulated sugar, 100 g (½ cup): Watch it like a hawk when melting—the color goes from perfect to burnt in about five seconds flat.
- Heavy cream, 60 ml (¼ cup): Cold cream straight from the fridge will seize the hot caramel slightly, creating a perfect emulsion if you whisk gently.
- Fine sea salt (caramel), ¼ tsp: The fine salt dissolves into the caramel and won't leave gritty surprises, unlike coarse varieties.
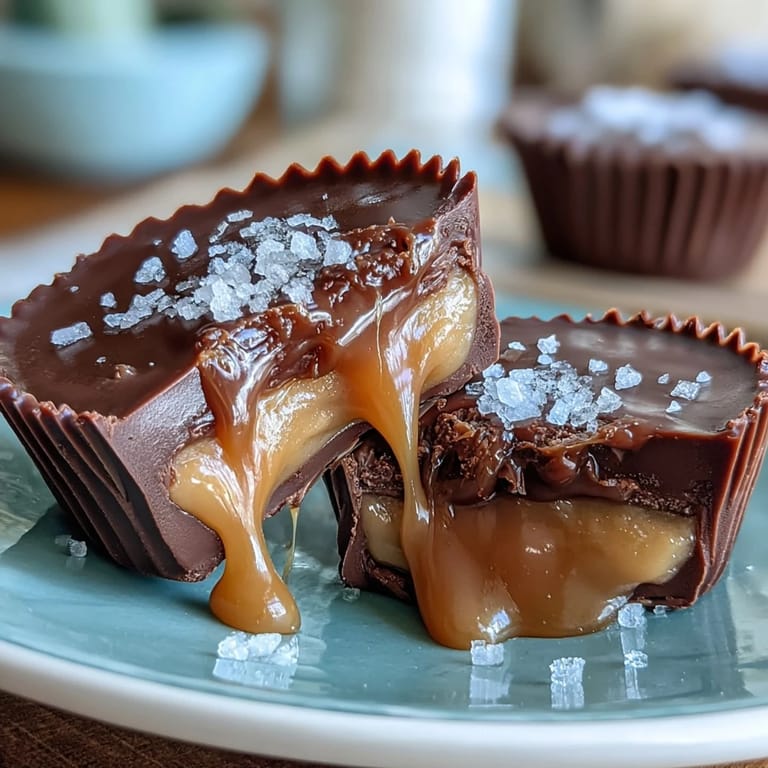
- Flaky sea salt, for topping: This is your finishing flourish—it should be visible and crunchy, the textural wake-up call that makes people reach for another cup.
Tired of Takeout? 🥡
Get 10 meals you can make faster than delivery arrives. Seriously.
One email. No spam. Unsubscribe anytime.
Instructions
- Set up your station:
- Line your muffin tin with paper liners and have all ingredients within arm's reach before you start melting anything—once chocolate hits heat, things move fast and you won't want to scramble looking for the sea salt.
- Melt the chocolate base:
- Use a double boiler or microwave in 30-second bursts, stirring between each round until you've got glossy, smooth chocolate with zero lumps. Microwave is actually easier for this because you can see exactly when it's ready without scorching it.
- Coat the liners:
- Spoon about a tablespoon of melted chocolate into each liner and tilt gently so it coats the bottom evenly—think of it like painting, not pouring. Pop these into the freezer for exactly 10 minutes so they set firm but not so hard that the next layer won't stick.
- Prepare the peanut butter filling:
- Mix softened butter, peanut butter, powdered sugar, and vanilla in a bowl until you've got a smooth paste with no visible streaks. Divide into 12 equal pieces and gently press each one into a thin disc that fits inside your chocolate cups.
- Make the salted caramel:
- Pour sugar into your saucepan, crank heat to medium, and watch without stirring—just swirl the pan occasionally so it caramelizes evenly. The moment it turns a deep golden amber (not brown), add butter and stir until melted, then very slowly drizzle in cold heavy cream while whisking steadily because it will hiss and bubble like it's angry with you, but that's exactly what you want.
- Cool the caramel:
- Stir in the fine sea salt and let it sit for 10 minutes so it thickens just slightly and becomes more cooperative. Taste a tiny drop on your finger once it's cooled a bit—this is your quality check moment.
- Assemble the cups:
- Remove the chocolate-lined liners from the freezer, place a peanut butter disc in each one, then top with about a teaspoon of cooled caramel. The caramel should be thick enough to sit on top without running all over the place.
- Seal with chocolate:
- Spoon the remaining melted chocolate over the top of each cup, smoothing it gently with the back of the spoon so you've got an even seal. Make sure you've got enough chocolate to completely cover the caramel layer or it'll start separating in the fridge.
- Add the finishing salt:
- Sprinkle just a few flakes of flaky sea salt on each cup while the chocolate is still warm enough to grab onto them. Don't overdo this—restraint here is what separates homemade candy from looking like you got creative with the salt shaker.
- Final chill:
- Refrigerate for at least 30 minutes until everything is set firm and the chocolate snaps cleanly when you bite into it. Store in an airtight container in the fridge for up to a week, though honestly they rarely last that long.
 Save
Save There was this one afternoon when my nephew watched me make these and asked why I wasn't using a mold or a fancy tool—he genuinely couldn't believe a spoon was all you needed. When he bit into one and his face just went quiet for a second, I realized these cups had crossed from being a recipe into something that actually mattered to people I loved. That's when food stops being just technique and becomes memory.
Why Chocolate Matters More Than You Think
Good chocolate is non-negotiable here because it's literally half your finished product—cheap chocolate tastes like wax and ruins the whole vibe no matter how perfect your caramel is. I learned this the hard way by going budget on my first batch, and the bitterness was sharp enough that I had to doctor them with extra vanilla and sugar. Now I taste a small piece of any chocolate before committing, which feels pretentious until you realize you've just saved yourself from a batch of mediocrity.
The Caramel Window is Everything
Caramel has this tiny golden moment between perfect and burnt that lasts maybe ten seconds, and you absolutely have to watch it the entire time—no phone scrolling, no checking your email, just you and the pan. I once stepped away to answer the door and came back to burnt sugar that smelled like a tire fire and tasted like regret. The trick is recognizing that deep amber color and trusting your instincts enough to pull it off heat, because it keeps cooking for another beat after you turn the burner off.
Storage and Gifting Secrets
These keep beautifully in the fridge for up to a week, but honestly they taste best within three days when the chocolate is still snappy and the caramel hasn't started to crystallize. Room temperature makes the chocolate soft and sad, so keep them cold until the exact moment someone bites into one. For gifting, stack them in a pretty container with parchment between layers so they don't stick together and start a chocolate-covered domino situation.
- Wrap them individually in wax paper if you're mailing them across the country—they'll survive the journey and arrive looking untouched.
- Make a double batch and freeze half unbaked in the muffin liners, then finish them whenever you want fresh chocolate in your life.
- If the caramel splits or looks broken, gently whisk in a splash more heavy cream and let it cool again before using.
 Save
Save These homemade peanut butter cups prove that you don't need fancy equipment or culinary school to make something that tastes like it came from a high-end chocolate shop. Once you've made them once, you'll find yourself making them again because the combination of textures and flavors is honestly hard to stop thinking about.
Recipe Questions & Answers
- → How do I ensure the chocolate base sets properly?
Chill the chocolate-coated liners in the freezer for about 10 minutes to allow the chocolate to firm up before adding the filling.
- → Can I substitute peanut butter for allergies?
Yes, almond butter or sunflower seed butter can be used as alternatives for a nut-free option.
- → What is the purpose of using flaky sea salt on top?
Flaky sea salt adds a delicate crunch and enhances the sweet-salty contrast of the cups.
- → How long should the salted caramel cool before assembly?
Allow the caramel to cool for about 10 minutes to thicken for easier handling and layering.
- → What storage method is best for maintaining freshness?
Store the cups in an airtight container in the refrigerator for up to one week to keep them fresh and firm.