 Save
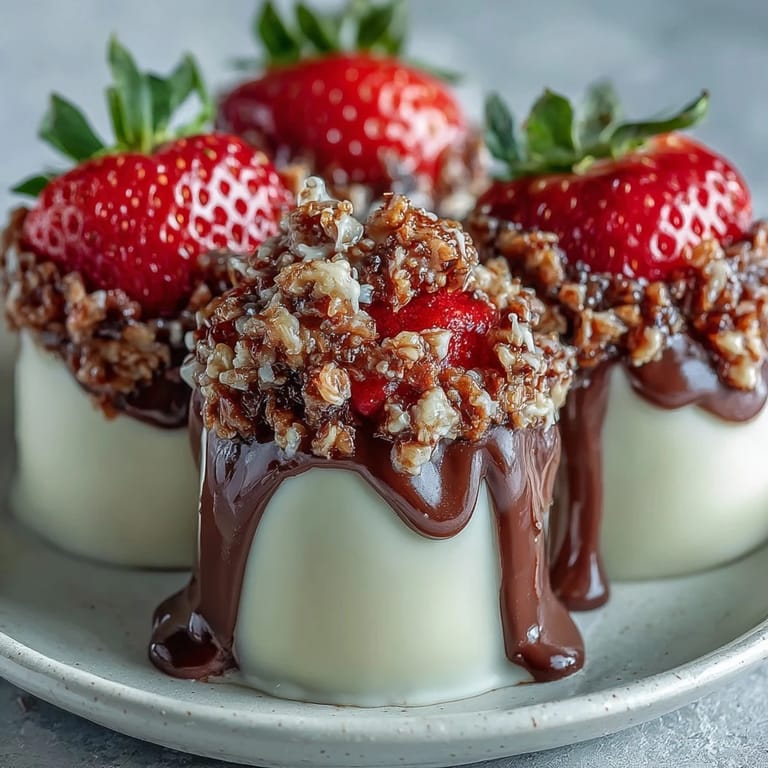
Save There's something about assembling these chocolate cups that feels like you're holding onto a secret. I discovered them during a late afternoon spent scrolling through photos of Dubai's glittering dessert shops, mesmerized by the jewel-like presentation of chocolate vessels filled with fruit and florals. The combination of dark chocolate, fresh strawberries, and the perfumed whisper of rosewater felt like a conversation between continents happening right on my kitchen counter. What started as curiosity became an obsession with getting the chocolate coats just thin enough to crack cleanly, yet sturdy enough to hold everything inside without spilling.
I made these for my sister's dinner party on a warm spring evening, and watching her eyes widen when she saw them sitting on the dessert table was worth every careful brush stroke. Everyone wanted to know if they were store-bought, and I loved the moment of quiet satisfaction when I said I'd made them myself, still warm from the kitchen. That night, I realized these cups aren't just dessert—they're edible proof that patience and attention to detail create something genuinely beautiful.
Ingredients
- High-quality dark chocolate (70% cocoa), chopped: The cocoa percentage matters here because it provides bitterness that balances the sweet strawberries and floral rosewater—cheaper chocolate can taste waxy and muddy by comparison.
- Fresh strawberries, hulled and diced: Choose berries that are ripe but still firm, as they'll hold their shape better during maceration and won't turn the filling into mush.
- Rosewater: A little goes a long way, so measure carefully or you'll end up with something that tastes like perfume instead of dessert; quality matters since the flavor is so concentrated.
- Honey: This adds depth beyond simple sweetness and keeps the filling glossy; raw honey works beautifully if you want subtle floral notes.
- Orange zest: The oils in fresh zest brighten everything without adding juice that would make the filling weep, so don't skip this or substitute dried.
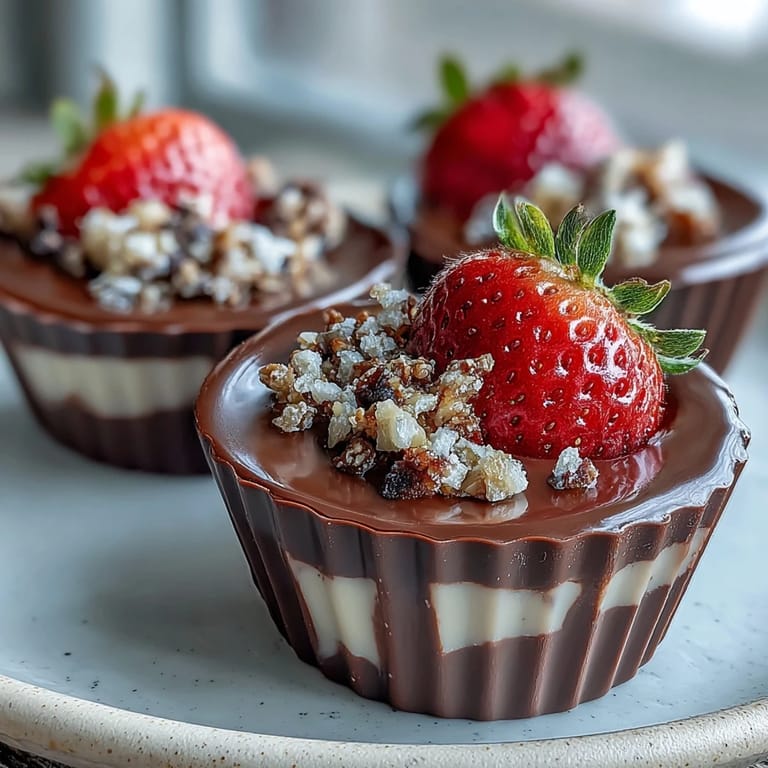
- Unsalted pistachios, shelled and roughly chopped: The green color against dark chocolate is visually stunning, and the subtle earthy flavor pairs perfectly with rosewater.
- Caster sugar: Fine granules dissolve quickly into syrup, which is crucial for creating that golden caramel coat without grittiness.
- Sea salt: Just a pinch amplifies the pistachio flavor and adds complexity that makes people ask what the secret ingredient is.
Tired of Takeout? 🥡
Get 10 meals you can make faster than delivery arrives. Seriously.
One email. No spam. Unsubscribe anytime.
Instructions
- Melt your chocolate gently:
- Use a double boiler if you have one—it's more forgiving than the microwave and less likely to overheat and seize into a grainy mess. If using a microwave, heat in 20-second bursts, stirring between each one, until you have smooth, glossy chocolate that feels warm to the touch.
- Coat the molds with intention:
- Using a pastry brush or the back of a spoon, work the melted chocolate up the sides of each silicone cup with steady, overlapping strokes to avoid gaps. The goal is an even layer that's thick enough to hold shape but not so thick that it becomes unwieldy.
- Build structural strength:
- That first chill for 10 minutes sets the initial layer so it doesn't drip when you add the second coat. The second coat adds insurance against cracks during unmolding and creates a more elegant final product.
- Create golden pistachio magic:
- Watch the sugar and water mixture closely once you add the pistachios—the transition from wet and sticky to dry and caramelized happens in moments. Spread it thin on parchment immediately after it's done, or it'll harden into one immovable chunk.
- Let the strawberries marry their flavors:
- Those 10 minutes of maceration allow the honey and rosewater to gently perfume the berries without making them soggy or turning their juice into syrup. The orange zest stays bright and doesn't oxidize if you toss everything together just before this resting period.
- Assemble with precision:
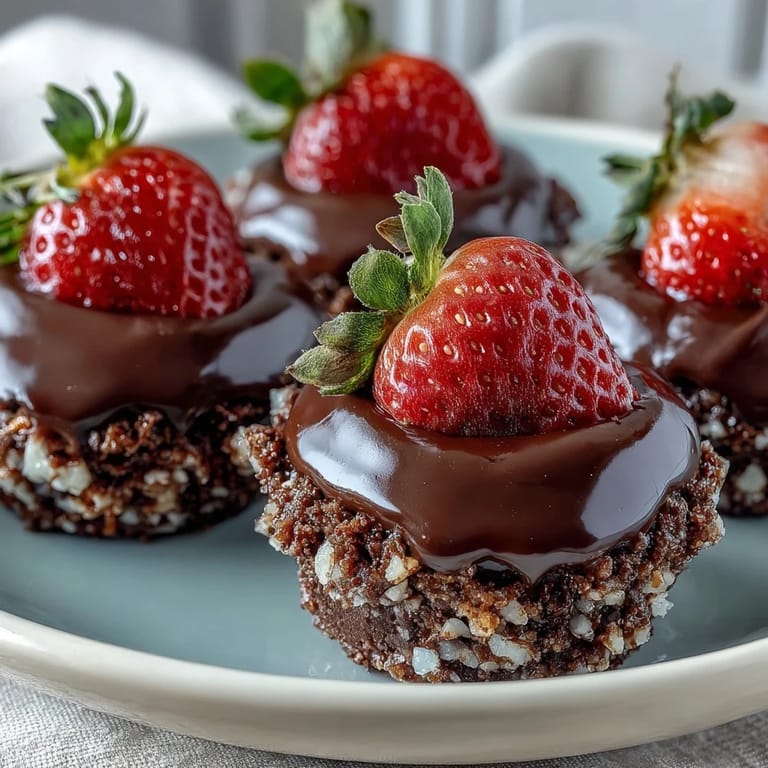
- Carefully peel away the silicone molds just before serving for the cleanest presentation, then spoon the strawberry mixture and pistachio crunch into each cup. Top everything while the strawberries are still cold for maximum contrast with the chocolate.
 Save
Save These cups taught me that sometimes the most elegant desserts aren't complicated, just thoughtfully assembled. There's a quiet joy in creating something that looks like it came from a patisserie but actually came from your own hands.
Chocolate Cup Architecture
The key to cups that unmold cleanly is understanding how chocolate sets. Thinner is actually better than thick—a delicate shell holds its structure without the brittleness that comes from oversized layers. I've found that brushing with patient, overlapping strokes creates better coverage than trying to paint thick in fewer movements, and the silicone molds release far more reliably than paper liners, though paper creates a charming presentation if you serve them still in their cups.
The Rosewater and Orange Partnership
Rosewater can feel intimidating if you've never cooked with it, but pairing it with citrus zest is the safety net that prevents perfume-like flavors. The orange cuts through the floral notes and keeps everything tasting fresh rather than cloying. This combination comes straight from Middle Eastern dessert traditions where roses and citrus have been paired for centuries, so you're working with centuries of wisdom rather than just my preference.
Timing and Temperature Strategies
These cups live in a sweet spot between warm and chilled that you'll discover by doing them once. Fully chilled chocolate cups filled with ice-cold strawberries offer maximum contrast, while slightly warmer strawberries let the rosewater come through more clearly. The pistachio crunch should stay room temperature so it maintains its snap rather than softening against the cold chocolate.
- Chill finished cups for up to one hour before serving if you prefer them colder, but not longer or the strawberries will start to release too much juice.
- Assemble no more than 30 minutes before serving unless you're okay with slightly softer chocolate and more macerated strawberries.
- These taste completely different warm versus chilled, so make them twice and decide which version becomes your signature.
 Save
Save These chocolate cups remind me why I love cooking for people—it's not about following rules perfectly, but about creating moments where texture, flavor, and beauty exist in one beautiful bite. Make them, share them, and watch how something so simple becomes unforgettable.
Recipe Questions & Answers
- → How do I melt the chocolate without burning it?
Gently melt the dark chocolate over a double boiler or use short bursts in the microwave, stirring frequently to prevent overheating.
- → Can I use other nuts instead of pistachios?
Yes, chopped almonds or walnuts can replace pistachios, though they will slightly alter the flavor and texture.
- → How do I make the pistachio crunch sticky and caramelized?
Dissolve caster sugar in water over medium heat, add pistachios and a pinch of sea salt, stirring until golden and caramelized before cooling on parchment.
- → What is the purpose of rosewater in the filling?
Rosewater adds a delicate floral aroma that complements the sweetness of strawberries and richness of chocolate.
- → How can I store these cups before serving?
Keep the assembled cups chilled in the refrigerator for up to one hour to maintain texture and freshness.
- → Is there a vegan alternative for the honey?
Agave syrup is an excellent vegan substitute for honey, maintaining sweetness and balance in the filling.